Build a Custom Command and Operation
VertiGIS Studio Web has many built-in Commands and Operations which can be chained together to build custom behaviors with. If these commands and operations are not enough to accomplish your goal, you can use VertiGIS Studio Workflow to take custom behavior even further without writing custom code. If Workflow is still not enough to accomplish your needs, then it might be time to implement a custom command or operation.
This article will walk you through implementing a custom command in VertiGIS Studio Web that can record actions and a custom operation that returns a list of the executed actions.
Prerequisites
- Download and setup the VertiGIS Studio Web SDK.
- Check out the deployment instructions to learn more about deploying custom code to a VertiGIS Studio Web App.
Create the Backing Service
Every command or operation in VertiGIS Studio Web needs to be registered and implemented by a service or component, so the first thing we will do is create a service.
Create a new folder structure with the following files. These files define a new service and export it from the CustomService folder.
src/services/CustomService/CustomService.tssrc/services/CustomService/index.ts
- Service
- Index
import { ServiceBase } from "@vertigis/web/services";

export default class CustomService extends ServiceBase {}
export { default } from "./CustomService";
Learn more about implementing custom services
Register the Service with the Web SDK
Every service needs to be registered with the Web SDK in order to be discovered and initialized.
- Add a call to
registerServiceinsrc/index.ts.
export default function(registry: LibraryRegistry) {
    ...
    registry.registerService({
        id: "custom-service",
        getService: (config) => new CustomService(config),
    })
    ...
}
Register the Command and Operation
Commands and operations are registered in src/index.ts. The serviceId of the command or operation registration must match the id used in the registerService call.
import { LibraryRegistry } from "@vertigis/web/config";
import CustomService from "./services/CustomService/CustomService";

export default function (registry: LibraryRegistry) {
    registry.registerService({
        id: "custom-service",
        getService: (config) => new CustomService(config),
    });

    registry.registerCommand({
        name: "custom-service.do-action",
        serviceId: "custom-service",
    });

    registry.registerOperation({
        name: "custom-service.get-action-history",
        serviceId: "custom-service",
    });
}
Implement the Custom Command and Operation
It's now time to implement the command to record an action, and the operation that returns a history of executed actions in the CustomService. We can define each command and operation with an appropriately named protected method that is decorated with @command and @operation respectively.
import { ServiceBase } from "@vertigis/web/services";
import { command, operation } from "@vertigis/web/messaging";

export type ActionType = "thing1" | "thing2";

export interface DoActionArgs {
    type: ActionType;
    value: string;
}

export type ActionHistory = {
    [key in ActionType]: string[];
};

export default class CustomService extends ServiceBase {
    history: ActionHistory = {
        thing1: [],
        thing2: [],
    };

    @command("custom-service.do-action")
    protected _doAction(args: DoActionArgs) {
        console.log(`Executing action of type ${args.type}`);
        this.history[args.type].push(args.value);
    }

    @operation("custom-service.get-action-history")
    protected _getActionHistory(): ActionHistory {
        return this.history;
    }
}
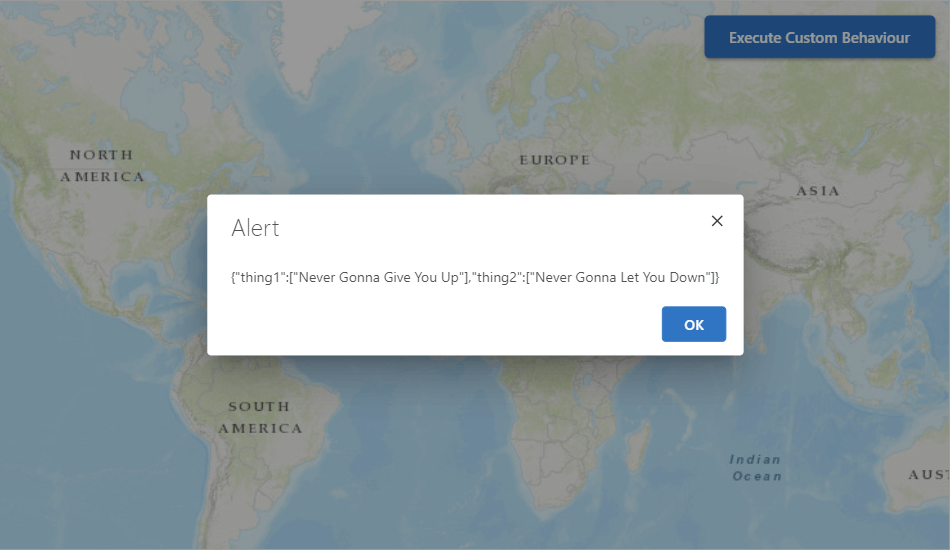
Test the Custom Command and Operation
You can test your custom command and operation by adding entries to the I Want to Menu in the app config that run your commands and operation. For more information on customizing your app with commands and operations, see commands and operations.
The following app config and layout adds three entries to an I Want To Menu that run the custom commands and operations implemented in this article. The operation custom-service.get-action-history has been slightly changed to return an argument that is compatible with the inputs of ui.alert.
- App Config
- Layout
- Custom Service
- UI
{
    "schemaVersion": "1.0",
    "items": [
        {
            "$type": "menu",
            "id": "iwtm-config",
            "items": [
                "item://menu-item/run-thing-1",
                "item://menu-item/run-thing-2",
                "item://menu-item/view-action-history"
            ],
            "title": "Execute Custom behavior",
            "isLandmark": true
        },
        {
            "$type": "menu-item",
            "id": "run-thing-1",
            "title": "Run Thing 1",
            "action": {
                "name": "custom-service.do-action",
                "arguments": {
                    "type": "thing1",
                    "value": "Never Gonna Give You Up"
                }
            }
        },
        {
            "$type": "menu-item",
            "id": "run-thing-2",
            "title": "Run Thing 2",
            "action": {
                "name": "custom-service.do-action",
                "arguments": {
                    "type": "thing2",
                    "value": "Never Gonna Let You Down"
                }
            }
        },
        {
            "id": "view-action-history",
            "$type": "menu-item",
            "title": "View Action History",
            "action": [
                "custom-service.get-action-history",
                "ui.alert"
            ]
        }
    ]
}
<?xml version="1.0" encoding="UTF-8"?>
<layout xmlns="https://geocortex.com/layout/v1" xmlns:custom="your.custom.namespace">
    <map id="map-primary">
        <iwtm config="iwtm-config"/>
    </map>
</layout>
import { ServiceBase } from "@vertigis/web/services";
import { AlertCommandArgs } from "@vertigis/viewer-spec/messaging/registry/ui";
import { command, operation } from "@vertigis/web/messaging";

export type ActionType = "thing1" | "thing2";

export interface DoActionArgs {
    type: ActionType;
    value: string;
}

export type ActionHistory = {
    [key in ActionType]: string[];
};

export default class CustomService extends ServiceBase {
    history: ActionHistory = {
        thing1: [],
        thing2: [],
    };

    @command("custom-service.do-action")
    protected _doAction(args: DoActionArgs) {
        console.log(`Executing action of type ${args.type}`);
        this.history[args.type].push(args.value);
    }

    @operation("custom-service.get-action-history")
    protected _getActionHistory(): AlertCommandArgs {
        return { message: JSON.stringify(this.history) };
    }
}
Live Sample
Check out a live SDK sample that demonstrates implementing custom commands and operations.
Next Steps
Commands and operations are the logical building blocks of executing custom behavior in VertiGIS Studio Web, but sometimes you need to take things a bit further. Creating custom components can allow you to design completely custom UI for VertiGIS Studio Web, and creating services can enable shared logic and background tasks.
Commands and Operations
Learn more about creating custom commands and operations
Implement a Custom Component with UI
Learn how to implement a custom component using the VertiGIS Studio Web SDK
Custom Services
Learn more about custom services