Customize the Theme
VertiGIS Studio Web's appearance is built around two concepts: theme and layout. The theme controls the color scheme of the app, while the layout controls the organization of content.
The theme can be partially configured by using the VertiGIS Studio Web Designer.
Prerequisites
- Follow along by setting up the VertiGIS Studio Web SDK and editing the minimal layout and app config provided.
- Check out the deployment instructions to learn about how to deploy layout and app config to an application.
Create a Basic App
Let's create a basic application with layout and config that we can theme.
- Layout
- App Config
{
    "schemaVersion": "1.0",
    "items": [
        {
            "$type": "map-extension",
            "id": "default",
            "onClick": [
                "geometry.add-pixel-tolerance",
                "tasks.identify",
                "results.display-details"
            ],
            "webMap": "https://www.arcgis.com/home/item.html?id=0ba877a4185448cb832af9a661031e31"
        },
        {
            "$type": "results",
            "id": "results-list-config",
            "onFeatureClick": ["results.display-details"]
        }
    ]
}
<?xml version="1.0" encoding="UTF-8"?>
<layout xmlns="https://geocortex.com/layout/v1">
  <split resizable="true">
    <panel show-close-button="false" width="26">
      <layer-list models="#map-primary"/>
      <results-list active="false" config="results-list-config"/>
      <feature-details active="true" />
    </panel>
    <stack>
      <map id="map-primary" config="default"/>
    </stack>
  </split>
</layout>
Add Configuration for the Branding Service
Next, we are going to add an app item to configure the Branding Service, which manages application theming.
{
    "schemaVersion": "1.0",
    "items": [
        {
            "$type": "map-extension",
            "id": "default",
            "onClick": [
                "geometry.add-pixel-tolerance",
                "tasks.identify",
                "results.display-details"
            ],
            "webMap": "https://www.arcgis.com/home/item.html?id=0ba877a4185448cb832af9a661031e31"
        },
        {
            "$type": "results",
            "id": "results-list-config",
            "onFeatureClick": ["results.display-details"]
        },
        {
            "$type": "branding",
            "id": "branding"
        }
    ]
}
Add a New Theme
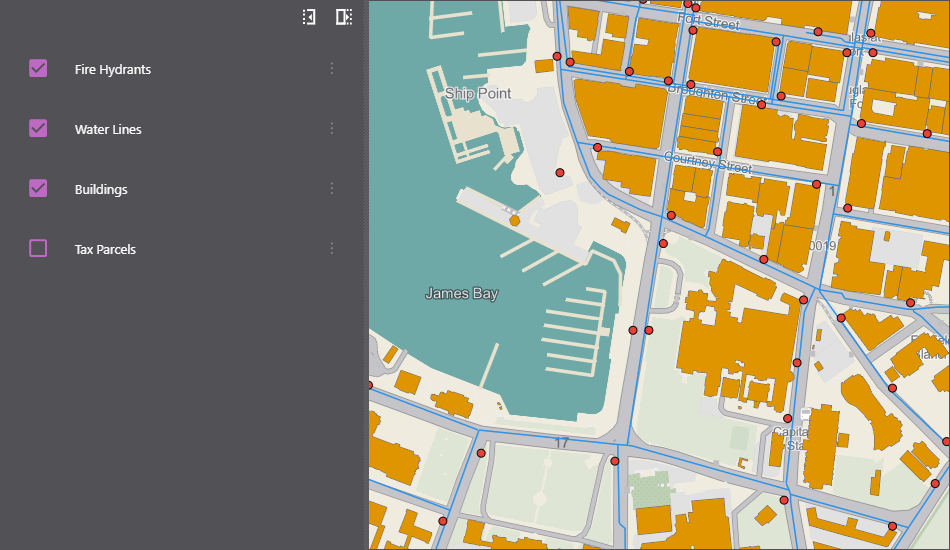
The branding service can be configured with a list of themes. Each of these themes can be based on one of the two existing themes, light or dark. Let's configure our branding service with a new dark theme with an accent color purple.
- App Config
- UI
{
    "schemaVersion": "1.0",
    "items": [
        {
            "$type": "map-extension",
            "id": "default",
            "onClick": [
                "geometry.add-pixel-tolerance",
                "tasks.identify",
                "results.display-details"
            ],
            "webMap": "https://www.arcgis.com/home/item.html?id=0ba877a4185448cb832af9a661031e31"
        },
        {
            "$type": "results",
            "id": "results-list-config",
            "onFeatureClick": ["results.display-details"]
        },
        {
            "$type": "branding",
            "id": "branding",
            "activeTheme": "custom-theme",
            "themes": [
                {
                    "id": "custom-theme",
                    "accentColor": "purple",
                    "template": "dark"
                }
            ]
        }
    ]
}
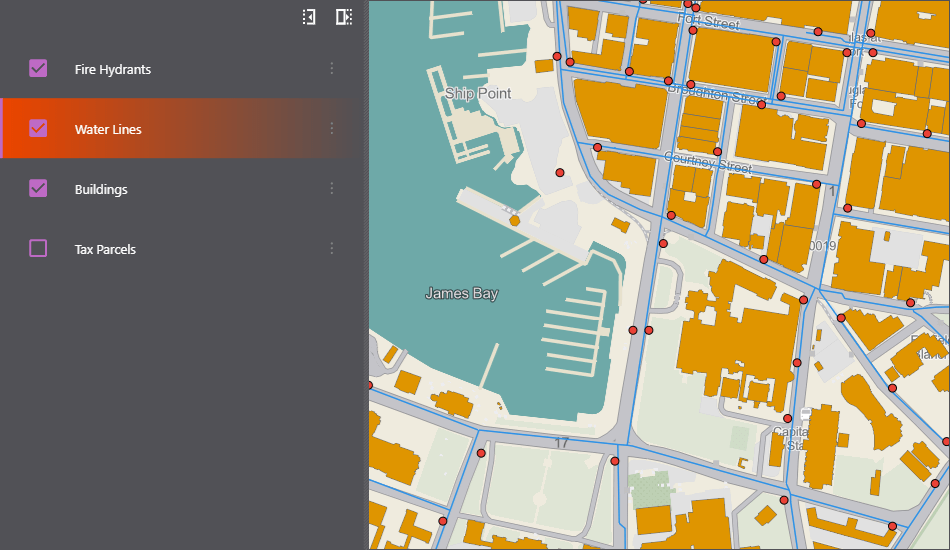
Customize the Theme
You can customize the theme by changing any of the built-in color keys used for themes.
- App Config
- UI
{
    "schemaVersion": "1.0",
    "items": [
        {
            "$type": "map-extension",
            "id": "default",
            "onClick": [
                "geometry.add-pixel-tolerance",
                "tasks.identify",
                "results.display-details"
            ],
            "webMap": "https://www.arcgis.com/home/item.html?id=0ba877a4185448cb832af9a661031e31"
        },
        {
            "$type": "results",
            "id": "results-list-config",
            "onFeatureClick": ["results.display-details"]
        },
        {
            "$type": "branding",
            "id": "branding",
            "activeTheme": "custom-theme",
            "themes": [
                {
                    "id": "custom-theme",
                    "accentColor": "purple",
                    "template": "dark",
                    "colors": {
                        "secondaryBackground": [249, 77, 0, 255]
                    }
                }
            ]
        }
    ]
}