Creating Custom Bands with the Inline SDK
With VertiGIS Inline 2.3 and later, users now have the ability to create their own custom bands that run right in Inline using the VertiGIS Inline SDK. These custom bands are made with React and TypeScript, giving authors total control over what the band can do. Today, we will run through the steps to build, deploy and use a custom band in an Inline view.
To use these new features, you will need the latest versions of VertiGIS Inline, VertiGIS Studio Web, and the VertiGIS Inline SDK.
Getting Started
You will need a few tools to build a custom band:
Once you are set up with those you can create a folder with everything you need to build a custom band. With the terminal of your choice, create instance of inline sdk with
npx @vertigis/inline-sdk create <my-project>
Open the folder with the name you supplied in VS Code. You should see a number of files already there.
Exploring the SDK
There are a few key parts of the SDK that you can use to build your own custom band.
Registry Service
Custom bands are registered in Inline using a custom VertiGIS Web service. This service is found in src/services/CustomBandRegistry/CustomBandRegistry.ts. This file loads any available custom bands and registers them with Inline when it is added to an app. It can register any number of custom bands at the same time.
Modifying this service is not recommended. It can result in unexpected behavior including causing your app to crash. Do so at your own risk.
Types
In the src/definitions/inline.d.ts file you can find all of the Inline types that you can use to create your custom band. There are comments provided in this file to describe the uses of these types.
Sample Band
The Inline SDK comes preinstalled with a sample band that you can use for reference. In your SDK navigate to src/bands/SampleBand. In here you will find 4 files.
Band.csscontains the styles that are applied to the chart.Band.tsxcontains the React code that is run in Inline.designer.tsdescribes the settings that are available when configuring a custom band in the Inline Designer.index.tscombines it all together to be properly registered.
Creating a new band
The band we will be creating today will be able to display a video and seek to any point in the video based on the location of the crosshair on the map and on other inline charts.
To create a new band run
npx @vertigis/inline-sdk generate VideoBand
The generate command must be run from within the custom band project folder.
Add settings for the Inline Designer
The designer.ts file provides the Inline designer with a settings schema to display configurable settings for a custom band. These settings can be any combination of:
- input
- checkbox
- radio
- dropdown
The Sample Band has some examples of how to use these settings. The src/bands/VideoBand/designer.ts file will have a small function ready to go.
import { InlineDesignerConfig } from "inline";

export const getDesignerConfig = (): InlineDesignerConfig => {
    const config: InlineDesignerConfig = [
        {
            title: "Video Band Settings",
            fields: [],
        },
    ];

    return config;
};
The InlineDesignerConfig is a list of settings sections. Each section has a name and list of fields that can be configured by users in the Inline designer.
Next, add an input field for the video URL.
import { InlineDesignerConfig, InputDesignerConfig } from "inline";

export const getDesignerConfig = () => {
    const config: InlineDesignerConfig = [
        {
            title: "Video Band Settings",
            fields: [],
        },
    ];

    const urlField: InputDesignerConfig = {
        id: "url",
        type: "input",
        default: "",
        label: "Video URL",
        helpText:
            "The URL of the video. This must be a valid URL to a video file.",
    };

    config[0].fields.push(urlField);

    return config;
};
This pattern can be repeated to create any other settings that are necessary for the band.
Creating a Video Player React Hook
Without a video player, this band will not do much. Let's create one using a custom React Hook.
Create a new file the the VideoBand folder called useVideoPlayer.ts. In this file we will include all the tools we need to create an interactive video player in a custom band.
Set up the hook as a function that takes a single parameter, videoElement. This is a reference to a video HTML element.
const useVideoPlayer = (
    videoElement: React.MutableRefObject<HTMLVideoElement>
) => {};

export default useVideoPlayer;
Add some state to track to current status of the player.
import { useState } from "react";

const useVideoPlayer = (
    videoElement: React.MutableRefObject<HTMLVideoElement>
) => {
    const [playerState, setPlayerState] = useState({
        isPlaying: false,
        progress: 0,
        speed: 1,
        isMuted: false,
    });
};
Add a function to toggle the current play/pause state of the video.
const useVideoPlayer = (videoElement: React.MutableRefObject<HTMLVideoElement>) => {
    ...
    const togglePlay = () => {
        setPlayerState({
            ...playerState,
            isPlaying: !playerState.isPlaying
        });
    }
}
Add a function that updates the progress bar of the video as it is playing. The progress is any value between 0 and 100 and is not directly related to the length of the video.
const useVideoPlayer = (videoElement: React.MutableRefObject<HTMLVideoElement>) => {
    ...
    const handleOnTimeUpdate = () => {
        const progress = (videoElement.current.currentTime / videoElement.current.duration) * 100;
        setPlayerState({
            ...playerState,
            progress
        });
    };
}
Add a function to seek to any point in the video, taking a number that is the percentage of the video length that the video should start playing at.
const useVideoPlayer = (videoElement: React.MutableRefObject<HTMLVideoElement>) => {
    ...
    const seekTo = (value: number) => {
        if (value >= 0 && value <= 100) {
            videoElement.current.currentTime = (videoElement.current.duration / 100) * value;
            setPlayerState({
                ...playerState,
                progress: value
            });
        }
    };
}
Add functions to change the playback speed of the video and turn the sound on/off.
const useVideoPlayer = (videoElement: React.MutableRefObject<HTMLVideoElement>) => {
    ...
    const handleVideoSpeed = (event) => {
        const speed = +event.target.value;
        videoElement.current.playbackRate = speed;
        setPlayerState({
            ...playerState,
            speed
        });
    }

    const toggleMute = () => {
        setPlayerState({
            ...isMuted: !playerState.isMuted
        });
    }
}
Add useEffect hooks that will update the muted state of the video player, the playback speed, and the current play/pause state of the video player when their respective states have been changed.
import { useState, useEffect } from "react";

const useVideoPlayer = (videoElement: React.MutableRefObject<HTMLVideoElement>) => {
    ...
    useEffect(() => {
        videoElement.current.muted = playerState.isMuted;
    }, [playerState.isMuted, videoElement]);

    useEffect(() => {
        videoElement.current.playbackRate = playerState.speed;
    }, [playerState.speed, videoElement]);

    useEffect(() => {
        playerState.isPlaying ?
        void videoElement.current.play() :
        void videoElement.current.pause();
    }, [playerState.isPlaying, videoElement]);
}
Finally, provide all of these functions to the consumer of the hook by returning an object containing everything needed to create an interactive video player.
import { useState, useEffect } from "react";

const useVideoPlayer = (videoElement: React.MutableRefObject<HTMLVideoElement>) => {
    ...
    return {
        playerState,
        togglePlay,
        handleOnTimeUpdate,
        handleVideoSpeed,
        toggleMute,
        seekTo
    }
}
With everything put together, your useVideoPlayer hook should look like this:
import { useState, useEffect } from "react";

const useVideoPlayer = (
    videoElement: React.MutableRefObject<HTMLVideoElement>
) => {
    const [playerState, setPlayerState] = useState({
        isPlaying: false,
        progress: 0,
        speed: 1,
        isMuted: false,
    });

    const togglePlay = () => {
        setPlayerState({
            ...playerState,
            isPlaying: !playerState.isPlaying,
        });
    };

    const handleOnTimeUpdate = () => {
        const progress =
            (videoElement.current.currentTime /
                videoElement.current.duration) *
            100;
        setPlayerState({
            ...playerState,
            progress,
        });
    };

    const seekTo = (value: number) => {
        if (value >= 0 && value <= 100) {
            videoElement.current.currentTime =
                (videoElement.current.duration / 100) * value;
            setPlayerState({
                ...playerState,
                progress: value,
            });
        }
    };

    const handleVideoSpeed = (event) => {
        const speed = +event.target.value;
        videoElement.current.playbackRate = speed;
        setPlayerState({
            ...playerState,
            speed,
        });
    };

    const toggleMute = () => {
        setPlayerState({
            ...playerState,
            isMuted: !playerState.isMuted,
        });
    };

    useEffect(() => {
        videoElement.current.muted = playerState.isMuted;
    }, [playerState.isMuted, videoElement]);

    useEffect(() => {
        videoElement.current.playbackRate = playerState.speed;
    }, [playerState.speed, videoElement]);

    useEffect(() => {
        playerState.isPlaying
            ? void videoElement.current.play()
            : void videoElement.current.pause();
    }, [playerState.isPlaying, videoElement]);

    return {
        playerState,
        togglePlay,
        handleOnTimeUpdate,
        handleVideoSpeed,
        toggleMute,
        seekTo,
    };
};

export default useVideoPlayer;
Creating the component
Now, add the hook to your custom band. Open src/bands/VideoBand/Band.tsx. Here you will find a simple react component. This component is the entrypoint for the band. In the Band component, add a player ref and add your useVideoPlayer hook. Add the props function parameter to the component.
import React, { useRef } from "react";
import { BandProps } from "inline";
import "./Band.css";
import useVideoPlayer from "./useVideoPlayer";

export const Band: React.FC<BandProps> = (props) => {
    const player = useRef<HTMLVideoElement>();
    const {
        playerState,
        togglePlay,
        handleOnTimeUpdate,
        handleVideoSpeed,
        toggleMute,
        seekTo,
    } = useVideoPlayer(player);

    return <div className="video-band">Video Band</div>;
};
Add a video player and controls in a wrapper in the return statement of the component. The video player will take the URL to your video, player ref and the handleOnTimeUpdate function as props to the video player. The URL will be accessed using the band.customBandSettings prop passed in to the custom band.
This custom video band only works with hosted videos, not embedded video players.
return (
    <div className="video-band">
        <div className="video-wrapper">
            <video
                ref={player}
                onTimeUpdate={handleOnTimeUpdate}
                src={props.band.customBandSettings.url ?? ""}
            />
            <div className="controls"></div>
        </div>
    </div>
);
The first control we will add is the start/stop button. This will show an icon depending on whether the video is playing or paused. To use that icon we need to install an npm package, react-icons. Run
npm install react-icons
in the terminal to install all the icons you will need for this project.
import { BiPlay, BiPause} from "react-icons/bi";
...
return (
    <div className="video-band">
        <div className="video-wrapper">
            ...
            <div className="controls">
                <div className="actions">
                    <button onClick={togglePlay}>
                        {!playerState.isPlaying ? (
                            <BiPlay color="white" />
                        ) : (
                            <BiPause color="white" />
                        )}
                    </button>
                </div>
            </div>
        </div>
    </div>
);
Add a progress bar that allows the user to seek through the length of the video and shows the current timestamp of the video. We also need to add a function to handle the input's onChange prop.
const handleVideoProgress = (event: React.ChangeEvent<HTMLInputElement>) => {
    const value = isNaN(+event.target.value) ? 0 : +event.target.value;
    seekTo(value);
}

return (
    <div className="video-band">
        <div className="video-wrapper">
            ...
            <div className="controls">
                {...}
                <input
                    type="range"
                    min="0"
                    max="100"
                    value={playerState.progress}
                    onChange={handleVideoProgress}
                />
            </div>
        </div>
    </div>
);
Add a dropdown with some options for different playback speeds.
return (
    <div className="video-band">
        <div className="video-wrapper">
            ...
            <div className="controls">
                {...}
                <select
                    className="velocity"
                    value={playerState.speed}
                    onChange={handleVideoSpeed}
                >
                    <option value="0.50">0.50</option>
                    <option value="1">1</option>
                    <option value="1.25">1.25</option>
                    <option value="2">2</option>
                </select>
            </div>
        </div>
    </div>
);
The last thing to add is the mute button.
return (
    <div className="video-band">
        <div className="video-wrapper">
            ...
            <div className="controls">
                {...}
                <button className="mute-btn" onClick={toggleMute}>
                    {!playerState.isMuted ? (
                        <BiVolumeFull color="white"/>
                    ) : (
                        <BiVolumeMute color="white"/>
                    )}
                </button>
            </div>
        </div>
    </div>
);
With everything added your component should look like this:
import debounce from "lodash.debounce";
import {
    BiPlay,
    BiPause,
    BiVolumeFull,
    BiVolumeMute,
} from "react-icons/bi";
import React, { useEffect, useRef } from "react";
import useVideoPlayer from "./useVideoPlayer";
import "./Band.css";
import { BandProps } from "inline";

export const Band: React.FC<BandProps> = (props) => {
    const player = useRef<HTMLVideoElement>();
    const {
        playerState,
        togglePlay,
        handleOnTimeUpdate,
        handleVideoSpeed,
        toggleMute,
        seekTo,
    } = useVideoPlayer(player);

    const handleVideoProgress = (
        event: React.ChangeEvent<HTMLInputElement>
    ) => {
        const value = isNaN(+event.target.value)
            ? 0
            : +event.target.value;
        seekTo(value);
    };

    return (
        <div className="video-band container">
            <div className="video-wrapper">
                <video
                    ref={player}
                    onTimeUpdate={handleOnTimeUpdate}
                    src={props.band.customBandSettings.url ?? ""}
                />
                <div className="controls">
                    <div className="actions">
                        <button onClick={togglePlay}>
                            {!playerState.isPlaying ? (
                                <BiPlay color="white" />
                            ) : (
                                <BiPause color="white" />
                            )}
                        </button>
                    </div>
                    <input
                        type="range"
                        min="0"
                        max="100"
                        value={playerState.progress}
                        onChange={handleVideoProgress}
                    />
                    <select
                        className="velocity"
                        value={playerState.speed}
                        onChange={handleVideoSpeed}
                    >
                        <option value="0.50">0.50</option>
                        <option value="1">1</option>
                        <option value="1.25">1.25</option>
                        <option value="2">2</option>
                    </select>
                    <button className="mute-btn" onClick={toggleMute}>
                        {!playerState.isMuted ? (
                            <BiVolumeFull color="white" />
                        ) : (
                            <BiVolumeMute color="white" />
                        )}
                    </button>
                </div>
            </div>
        </div>
    );
};
Styling the band
With the band created let's add some styling. Add this to the src/bands/VideoBand/Band.css file:
.video-band.container {
    display: flex;
    justify-content: center;
    align-items: center;
    padding: 2rem;
    width: 100%;
}

.video-band h1 {
    color: white;
}

.video-band video {
    width: 100%;
}

.video-band .video-wrapper {
    width: 100%;
    max-width: 700px;
    position: relative;
    display: flex;
    justify-content: center;
    overflow: hidden;
    border-radius: 10px;
}

.video-band .video-wrapper:hover .controls {
    transform: translateY(0%);
}

.video-band .controls {
    display: flex;
    align-items: center;
    justify-content: space-evenly;
    position: absolute;
    bottom: 30px;
    padding: 14px;
    width: 100%;
    max-width: 500px;
    flex-wrap: wrap;
    background: rgba(255, 255, 255, 0.25);
    box-shadow: 0 8px 32px 0 rgba(255, 255, 255, 0.1);
    backdrop-filter: blur(4px);
    -webkit-backdrop-filter: blur(4px);
    border-radius: 10px;
    border: 1px solid rgba(255, 255, 255, 0.18);
    transform: translateY(150%);
    transition: all 0.3s ease-in-out;
}

.video-band .actions button {
    background: none;
    border: none;
    outline: none;
    cursor: pointer;
}

.video-band .actions button i {
    background-color: none;
    color: white;
    font-size: 30px;
}

input[type="range"] {
    -webkit-appearance: none !important;
    background: rgba(255, 255, 255, 0.2);
    border-radius: 20px;
    height: 4px;
    width: 350px;
}

.video-band input[type="range"]::-webkit-slider-thumb {
    -webkit-appearance: none !important;
    cursor: pointer;
    height: 6px;
}

.video-band input[type="range"]::-moz-range-progress {
    background: white;
}

.video-band .velocity {
    appearance: none;
    background: none;
    color: white;
    outline: none;
    border: none;
    text-align: center;
    font-size: 16px;
}

.video-band .mute-btn {
    background: none;
    border: none;
    outline: none;
    cursor: pointer;
}

.video-band .mute-btn i {
    background-color: none;
    color: white;
    font-size: 20px;
}
Deploying the band
Build the band
Now that the band has been created, we can add it to VertiGIS Studio Web and load it into Inline. In the terminal, run
npm run start
This will start up a development server and create a temporary build of your custom band.
Adding the band to your app
Open VertiGIS Studio Web Designer. In Web Designer, open your Inline app.
If you do not have an existing Inline app you can create a new app using the VertiGIS Inline template.
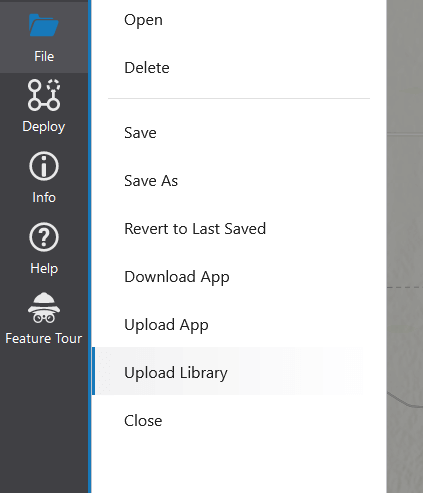
In your app, open the File menu. Open the Upload Library settings:
In the popup, add http://localhost:4444/main.js as a library URL:
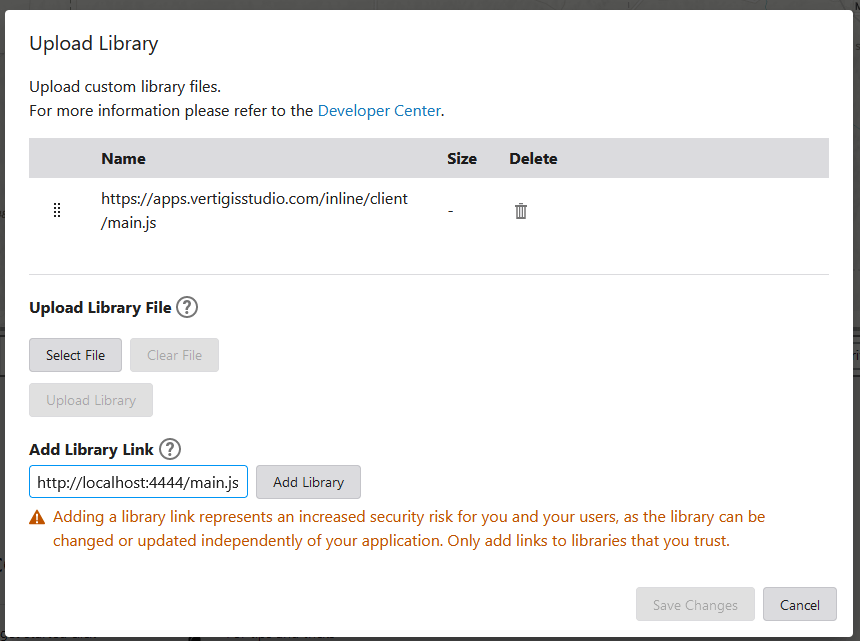
Click the Add Library button beside the library link input. Click Save Changes. Your app will be saved and be refreshed.
With this done you can close Web Designer and open the Inline Designer.
Using a custom Web App in Inline
In the Inline designer, open the view you want to add the band to.
Open the Sandbox settings on the left side panel:
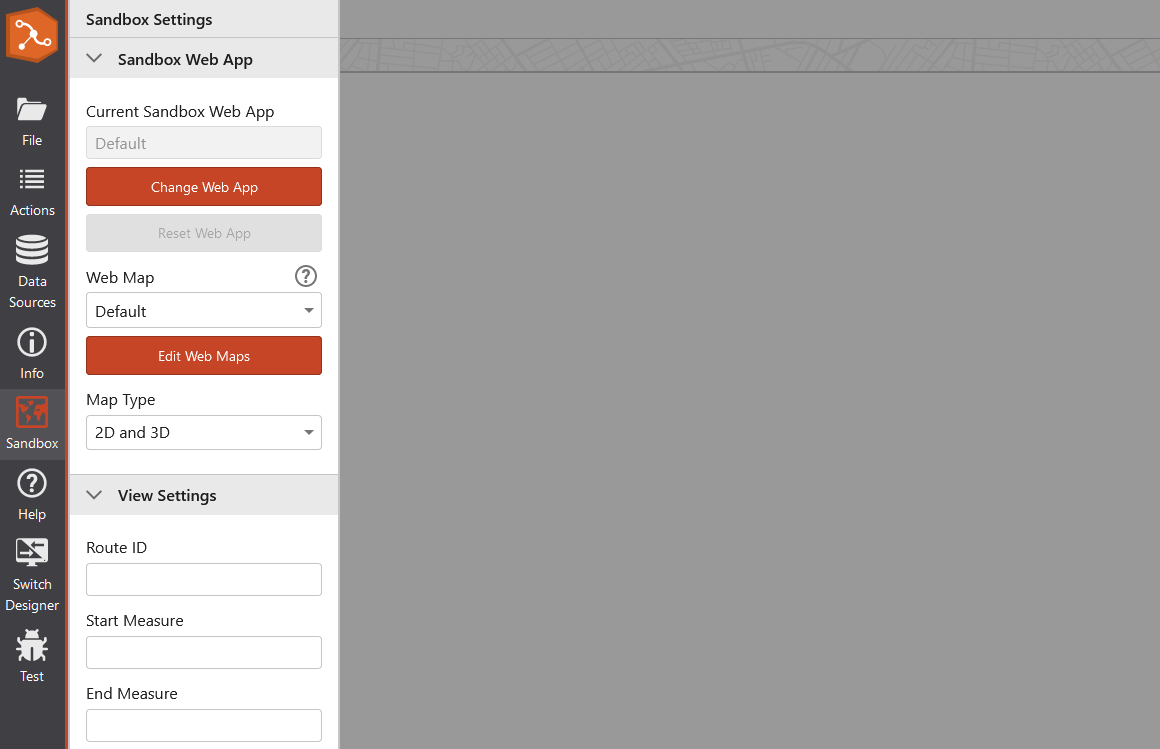
At the top of the panel, select Change Web App. This will open a window with a list of your VertiGIS Studio Web apps. Choose the Web app that you added your custom band library to.
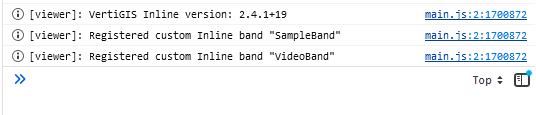
You can confirm that the custom bands have been loaded by checking your browser console. You should see a console log for each band that has been loaded.
Adding the custom band to your view
With Inline running your custom Web app, you can now add your band to your view using the Inline designer.
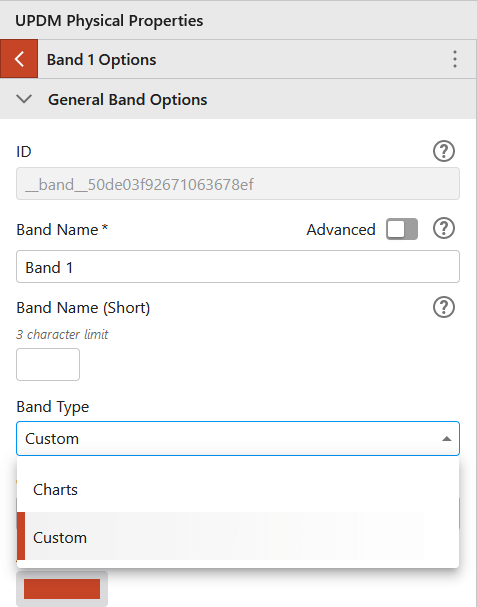
Add a new band to Inline. Open the new Band settings. In the Band Type dropdown choose "Custom".
In the Custom Band Name dropdown, choose "VideoBand".

You should see a new settings section with the option to add a Video URL. Add a URL to a Video URL setting.
Custom bands will sometimes require a refresh of the Inline sandbox before you can see them reflected in the charts. Click the Refresh Sandbox button in the top left of the Inline designer if you are not seeing your custom band in your view.
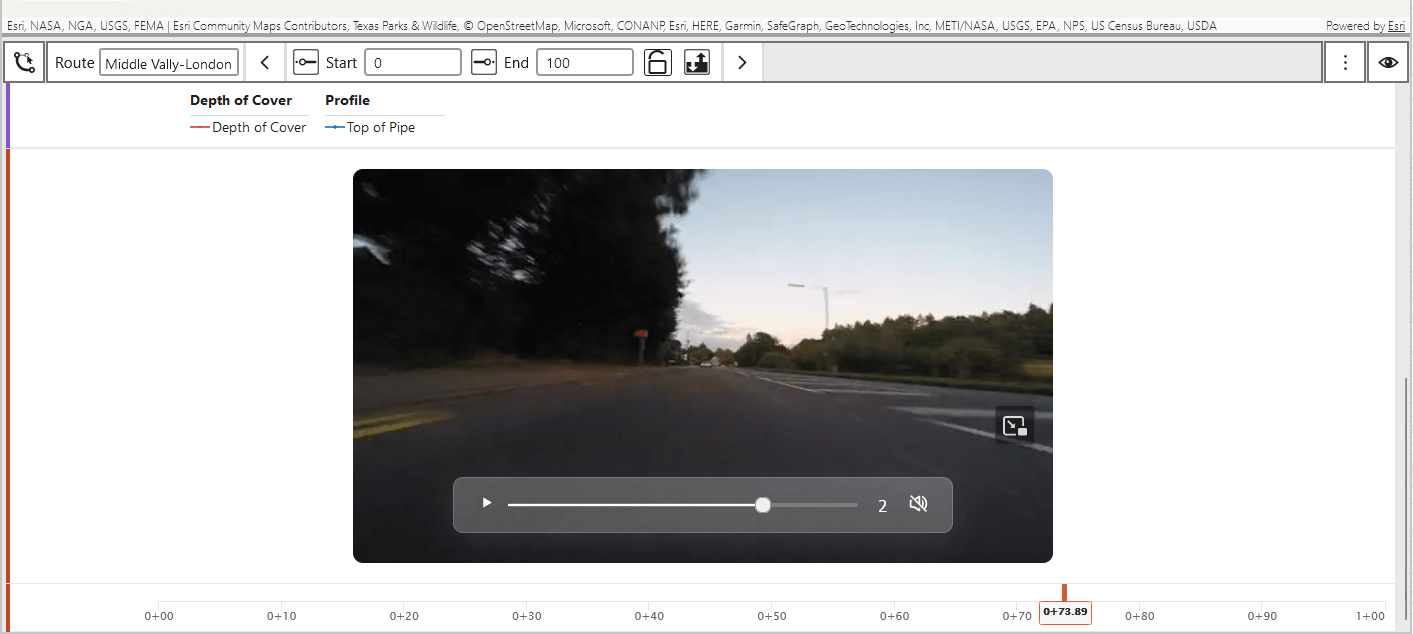
Choose a route and range for your view. When the bands load you should see your custom video band playing with your video. Hovering over the video should show the video controls.
Syncing the band with Inline
The band that we have now will show and run a video with all the controls, but it won't sync with the rest of your Inline bands. In order to do that we need to listen to some inline events. The Inline SDK allows custom bands to listen for and fire any Inline events. Types and descriptions for these events can be found in the definitions/Inline.d.ts file in the project.
Open VS Code and the src/bands/VideoBand/Band.tsx file. Add a new useEffect hook to the Band component.
import React, { useEffect, useRef } from "react";
...
export const Band: React.FC<BandProps> = (props) => {
    ...

    useEffect(() => {})

    return(...)
}
In the useEffect hook we will add some Inline event handlers using the InlineManager that is passed to the component via the props.
The InlineManager has a variety of different tools that can be used from within a custom band that can change how you interact with Inline. Many of the tools are typed in the Inline SDK and can be found in the definitions/Inline.d.ts file.
useEffect(() => {
    const mapCrosshairEvent = props.InlineManager.event(
        "ChartCrosshairLocationUpdateEvent"
    ).subscribe(undefined, handleCrosshairPositionChangeEvent);
    const chartCrosshairEvent = props.InlineManager.event(
        "XValueChangeEvent"
    ).subscribe(undefined, handleCrosshairPositionChangeEvent);

    return () => {
        props.InlineManager.event(
            "ChartCrosshairLocationUpdateEvent"
        ).unsubscribe(mapCrosshairEvent);
        props.InlineManager.event("XValueChangeEvent").unsubscribe(
            chartCrosshairEvent
        );
    };
});
There are two different events that we are listening for here. The ChartCrosshairLocationUpdateEvent is fired when the route is hovered over on the map. The XValueChangeEvent is fired when a chart is hovered over. Both of these will provide the same arguments and can be dealt with via the same handler.
Add a new function, handleCrosshairPositionChangeEvent, under the useEffect hook. This function will update the progress of the video to match the current location of the crosshair on the chart.
import { BandProps, StationInfoEventArg } from "inline";
...
export const Band: React.FC<BandProps> = (props) => {
    ...

    const handleCrosshairPositionChangeEvent = (
        arg: StationInfoEventArg
    ) => {
        // Don't try to update the position if the video player does not exist.
        if (!player.current) {
            return;
        }

        // Get the start and end measure of the current range to calculate the
        // percent along the line.
        const start =
            props.InlineManager.currentRange.beginStation.measure;
        const end = props.InlineManager.currentRange.endStation.measure;

        // Ensure the measure is within the range.  If it is not, clamp it to prevent
        // any errors.
        const measure = Math.max(
            start,
            Math.min(end, arg.stationInfo.measure)
        );

        const currentRangeLength = end - start;
        const percentageAlongLine =
            (measure - start) / currentRangeLength;

        // Move the video progress to the corresponding percentage through the video
        // that matches the percentage along the line.
        seekTo(percentageAlongLine * 100);

        // Pause the video to be able to see where the position that was jumped to is.
        if (playerState.isPlaying) {
            togglePlay();
        }
    };

    return(...)
}
The last thing we want to do is add a debounce to the handler to prevent any performance issues that can happen when moving around a lot. Install Lodash's debounce tool with
npm install lodash.debounce
Wrap the handleCrosshairPositionChangeEvent in a debounce higher order function. Give the debounce a 100ms refresh argument. Create and add a type, StationInfoEventHandler, to the function.
import debounce from "lodash.debounce";
...
type StationInfoEventHandler = (arg: StationInfoEventArg) => void;

export const Band: React.FC<BandProps> = (props) => {
    ...

    const handleCrosshairPositionChangeEvent: StationInfoEventHandler = debounce((arg: StationInfoEventArg) => {
        ...
    }, [100])

    return(...)
}
With the event handler and the event listeners added, the Band.tsx file should look like this:
import debounce from "lodash.debounce";
import {
    BiPlay,
    BiPause,
    BiVolumeFull,
    BiVolumeMute,
} from "react-icons/bi";
import React, { useEffect, useRef } from "react";
import useVideoPlayer from "./useVideoPlayer";
import "./Band.css";
import { BandProps, StationInfoEventArg } from "inline";

export const Band: React.FC<BandProps> = (props) => {
    const player = useRef<HTMLVideoElement>();
    const {
        playerState,
        togglePlay,
        handleOnTimeUpdate,
        handleVideoSpeed,
        toggleMute,
        seekTo,
    } = useVideoPlayer(player);

    /**
     * Subscribing to inline events can allow for better integration of custom bands into inline.
     */
    useEffect(() => {
        const mapCrosshairEvent = props.InlineManager.event(
            "ChartCrosshairLocationUpdateEvent"
        ).subscribe(undefined, handleCrosshairPositionChangeEvent);
        const chartCrosshairEvent = props.InlineManager.event(
            "XValueChangeEvent"
        ).subscribe(undefined, handleCrosshairPositionChangeEvent);
        return () => {
            props.InlineManager.event(
                "ChartCrosshairLocationUpdateEvent"
            ).unsubscribe(mapCrosshairEvent);
            props.InlineManager.event(
                "XValueChangeEvent"
            ).unsubscribe(chartCrosshairEvent);
        };
    });

    /**
     * When the inline cursor moves, it should update the video progress to match.
     */
    const handleCrosshairPositionChangeEvent = debounce(
        (arg: StationInfoEventArg) => {
            // Don't try to update the position if the video player does not exist.
            if (!player.current) {
                return;
            }

            // Get the start and end measure of the current range to calculate the
            // percent along the line.
            const start =
                props.InlineManager.currentRange.beginStation.measure;
            const end =
                props.InlineManager.currentRange.endStation.measure;

            // Ensure the measure is within the range.  If it is not, clamp it to prevent
            // any errors.
            const measure = Math.max(
                start,
                Math.min(end, arg.stationInfo.measure)
            );

            const currentRangeLength = end - start;
            const percentageAlongLine =
                (measure - start) / currentRangeLength;

            // Move the video progress to the corresponding percentage through the video
            // that matches the percentage along the line.
            seekTo(percentageAlongLine * 100);

            // Pause the video to be able to see where the position that was jumped to is.
            if (playerState.isPlaying) {
                togglePlay();
            }
        },
        [100]
    );

    const handleVideoProgress = (
        event: React.ChangeEvent<HTMLInputElement>
    ) => {
        const value = isNaN(+event.target.value)
            ? 0
            : +event.target.value;
        seekTo(value);
    };

    return (
        <div className="video-band container">
            <div className="video-wrapper">
                <video
                    src={props.band.customBandSettings.url ?? ""}
                    ref={player}
                    onTimeUpdate={handleOnTimeUpdate}
                />
                <div className="controls">
                    <div className="actions">
                        <button onClick={togglePlay}>
                            {!playerState.isPlaying ? (
                                <BiPlay color="white" />
                            ) : (
                                <BiPause color="white" />
                            )}
                        </button>
                    </div>
                    <input
                        type="range"
                        min="0"
                        max="100"
                        value={playerState.progress}
                        onChange={handleVideoProgress}
                    />
                    <select
                        className="velocity"
                        value={playerState.speed}
                        onChange={handleVideoSpeed}
                    >
                        <option value="0.50">0.50</option>
                        <option value="1">1</option>
                        <option value="1.25">1.25</option>
                        <option value="2">2</option>
                    </select>
                    <button className="mute-btn" onClick={toggleMute}>
                        {!playerState.isMuted ? (
                            <BiVolumeFull color="white" />
                        ) : (
                            <BiVolumeMute color="white" />
                        )}
                    </button>
                </div>
            </div>
        </div>
    );
};
Save the file. Open the Inline designer with the view configured with your custom band. Reload the page to get your new changes. You should be able to see the video scrub through as you hover over the charts and the map.
Production Build
Once you have a custom band working how you would like, you can create a optimized production build. In a terminal run
npm run build
This will create a build folder with a main.js file. We can replace the library link we previously added with the main.js file and your custom band will be accessible to anyone who uses your app.
In Web Designer, open the Upload Library panel. Remove the custom library URL. Save the changes.
Only remove the custom library URL, http://localhost:4444/main.js. Removing the Inline library can break your app and cause unexpected behavior.
Save your changes before uploading another library. Loading two libraries with the same service can cause unexpected behavior in Web Designer, including losing access to your app.
After saving the changes and reloading your app, Open the Update Library panel again. Instead of adding a URL, upload a file. Browse to your <Inline SDK folder>/build/main.js. Upload the file and save the changes.
Return to your Inline Designer. Reload the page. The custom band should work as expected.
Conclusion
With the information learned in this post you should be able to create your own custom Inline band. The sample band can be a great place to start and explore everything the Inline SDK can do. Using Inline events and the InlineManager can give you even more powerful tools to use in your custom bands, including running VertiGIS Studio Web Commands and Operations and even VertiGIS Studio Workflows!